I overhauled my old recipe system, and show you how to organize recipes in a binder to make things super simple for meal planning!
I started my recipe system when I was 15. I kid you not!

I bought a beautiful, Sterilite caddy and stack of 5” X 8” index cards from our little town’s Dollar General store, and created a recipe box that lasted me for the next 23 years of my life.
Every time I tried a new recipe, I would decide to either keep it or do away with it.
If I kept it?
Then I would transcribe it onto a recipe card and file it away to be used in the future.
Not only did this system serve me well, but it also created this cool way to see how my cooking has evolved since my late teens.
But you know what? The system is no longer working for me. And it hasn’t for probably a year.
Just two weeks ago, I decided to do something about it – to figure out how to organize recipes in a binder (and then to actually do it).
This is my sneak peek into my newly revamped recipe system (hint: it’s working fabulously for me – which will hopefully inspire you to get your own recipe and meal planning system down pat so that it works for you).
Because let’s face it – a well-run recipe collection and storage system? Will definitely save your family money in the food department.
Psst: curious what other people spend on food? Here's what the average household spends on groceries.
What’s a Recipe Binder System?


First of all, let’s look at what a recipe binder system really is (in case you don’t currently have one).
For me, a recipe binder system is a centralized location to catch all of the recipes you:
- Have tried, love, and want to keep it for years and years
- Have gathered from recipe books, magazine rip-outs, and printouts from the internet so that you can try them one day
But it’s also more than that.
It plugs seamlessly into your meal planning, and it also allows you to easily use the recipes while cooking (no more neck-craning for you, or me!).
With all your recipes organized into both the ones you want to try, and the ones you cycle in and out of eating, meal planning becomes much easier.
And when meal planning gets easier? Well, you start to save money on both grocery store ingredients AND from not eating out so much.
Why I’ve Outgrown My Current Recipe System
I’ve got piles of recipe papers in about 5 different locations. When I no longer was blind to these, I was finally able to realize that I’d simply outgrown my old recipe and meal-planning system.
Before we get into the exciting, and highly functional new one, I want to share with you the exact reasons why I’ve outgrown the recipe box/index card/binder system I currently have.
Because I think it will help you to pick your own system better.
I suspect you might come upon these same problems, yourself – heck, you might even be dealing with these problems right now.
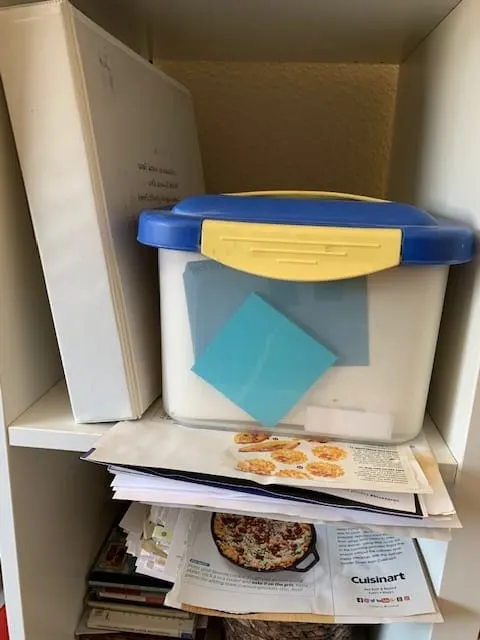
To be clear, my old system consisted of:
- Recipe box full of 5” X 8” index cards of handwritten recipes
- A binder that holds printouts/magazine articles of new recipes I want to try
- Several folders and piles of overflowing recipes – some that I’ve tried and want to try again, some that I want to keep but haven’t done the handwritten part, some that I wanted to try a month or two ago but didn’t get to

Problems with my old system:
- A glut of Recipes to Be Handwritten: I’ve got several piles of recipes I’ve tried and want to use again just hanging around because I don’t want to take the time to write them onto index cards. My 20-something self had this luxury of time to devote to this, but my 30-something, business-owner, mama-to-4-year-old, and married self? Not so much. So, it just doesn’t get done.
- Almost-Full Recipe Box: I’ve had my recipe box since I was 15, and it’s worked beautifully since then. But you know what? I’ve got only room for about 25 more recipes before I have to either get rid of some (gasp!) or get a second container.
- Overflowing Recipe Holder: Instead of my recipe holder in the kitchen holding just this week’s meals I want to create, it’s become this spot for recipes that haven’t made it into my recipe box, or that I just never got around to trying, or just random ones (that I’m not even sure why they’re there). Meaning, that I can’t easily prop up recipes anymore (they fold forward), and I can’t use them for online recipes on my phone or tablet since there’s no space anymore to hold my device.
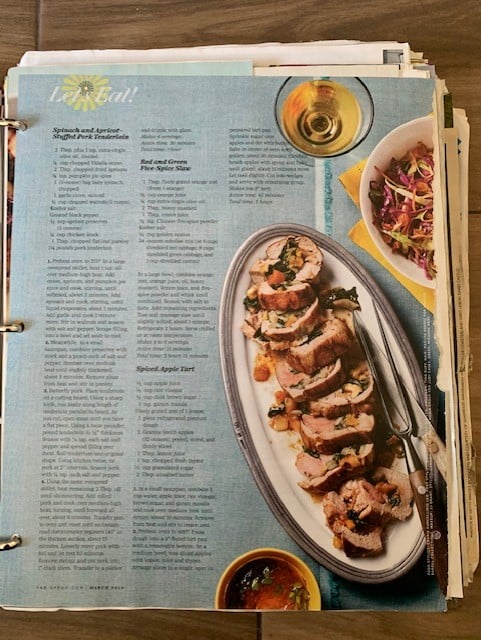
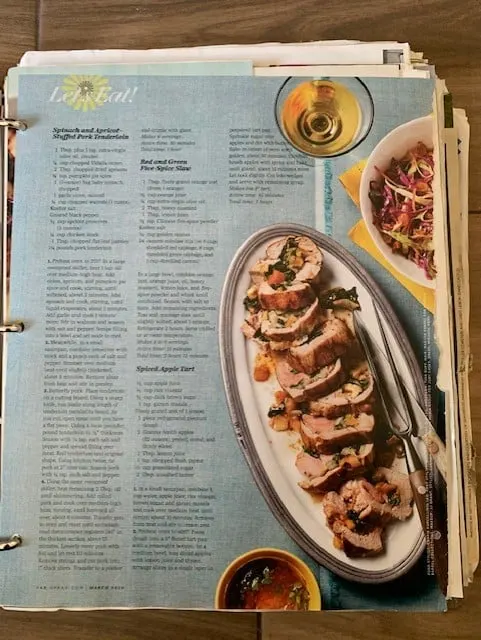
- Binder System of Recipes-to-Try Isn’t Working: In my to-try recipe binder, I can’t see any of the tabs (you know, so that I know where dinner recipes versus breakfast ones are – see image below) because of all the different magazine page widths, and so I’ve practically stopped using it.
Don’t worry – I’ve cleaned this up relatively quickly (after I finally became aware of the pain points). And you can, too!
Let me show you how.
DIY Recipe Binder – Exact Steps I Took
To DIY your own recipe binder, I'm going to detail the steps I took and the supplies I used.
First up, you can grab your free printables (hint: when you print these out, choose “Scale to Fit Paper” in your printer options so that nothing is cut off).

For starters, here's the DIY recipe binder supplies I used:
- Two Binders: One to fill with recipes to try, and one to fill with your treasured, to-keep recipes. I chose binders that open flat, for ease of use. I also chose binders with several pockets inside of them (if I know anything about myself, it’s that I always need a little extra storage space for papers). Finally, my binders each hold at least 650 sheets, giving me plenty of room to grow with this system (always good to think ahead so that you don’t find yourself buying all new stuff just a year or two later to let you grow – I’ve been there, before!).
- Two Sets of Extra-Wide Dividers: I’m not messing around anymore with dividers that I can’t see from unwieldy, random magazine pages and sheet protectors. It’s just too annoying. That’s why I’ve upgraded to extra-wide divider tabs with folders, to clearly see what section I need to get to. These make great recipe binder dividers because you can store that random, half-page tear-out, and you can also erase what you've written, and write new categories (so they can grow with my needs).
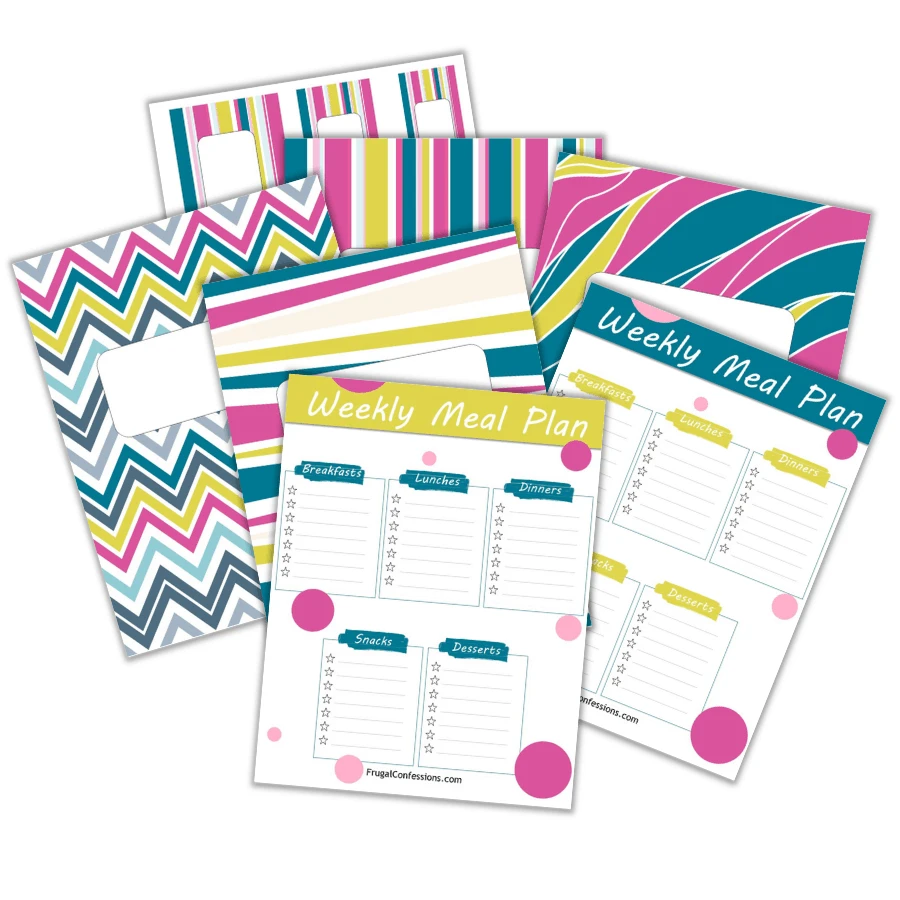
- Meal Planning Page: I’ve also created a one-sheet meal planning printable for you (and me!) to use in my binder. I’ll explain more about this, below.
- Evernote App: To quickly scan/capture, and clip recipes from either cookbooks at the library, or recipes I find around the internet. Here's where you can download this for free.
- Sheet Protectors: A set of standard 8.5” X 11” sheet protectors to place all of my to-keep recipes into. I also snagged a set of these mini sheet protectors to hold all of my index card recipes, which I had written on 5” X 8” index cards. Unfortunately…the pre-punched holes did not fit a 3-ring binder. SO, you either have to punch in one more hole (my hole puncher worked fine with the plastic), OR, put two of these sheets into one 8.5″ X 11″ sheet protector, to fit 4 index cards in one sheet like I had originally wanted to do. The extra plastic holds all the cards in place, so that's a plus.
- Recipe Holder for Cooking: It’s so much easier to cook either by a recipe sheet or by your phone/tablet when the recipe is standing upright in front of you. My sister gifted us a beautiful, wooden recipe holder (looks a lot like this one) a few years ago that I just love. Another great option is this one. Just make sure you choose one that will not only work with pieces of paper but will also hold up your smartphone/tablet, or a cookbook for ultimate functionality.
Here are the steps I took:
- Converted Index Cards to the Binder: I couldn't find 8.5″ X 11″ sheets that were divided in the middle so that two of my index cards would fit into them (and then two on the backside). That was quite frustrating! Instead, I used the mini-sheet protectors, filled them with back-to-back index cards, and then stacked them into the 8.5″ X 11″ sheet protectors. Amazingly, by static or whatever else, they remain stacked so that I can see all of my recipe index cards when I flip through the binder!
- Chose Categories for the Tabs: After leafing through my current categories and seeing what I had, I chose the following categories for my binders (both the keep-binder, and the to-try one): Breakfasts, Lunches, Dinners, Snacks, Sides, Desserts, Drinks, and Miscellaneous. What was really cool is that this is the exact number of tabs that came in those packages! Score. Then, I used the wet-erase markers to write them in. Then, I loaded them into the two binders.
- Gathered All Keep-Recipes and Put into Sheet Protectors: As mentioned previously, I had recipe piles everywhere. So, I gathered all my to-keep ones that hadn't been transcribed yet, and put those into sheet protectors, in the proper categories.
- Converted the To-Try Recipes: For my to-try recipes, I didn't use sheet protectors. Instead, I just took these all out of the old binder and old piles and put them into the right categories.
- Printed out the Meal Planning Printable: I printed out this super-easy meal planning printable, put it into a sheet protector, and stuck it as the front page of my to-keep binder. I also stashed one of the wet-erase markers inside of the binder so that I'll always have it available for meal planning. After I pick out a bunch of things for us to eat throughout the next week, I then take it out and stash it on my fridge or on my recipe stand so that I can easily figure out what to eat on any given day.
- Did a Victory Dance: For real, yo'! This was such a big, mini-project, and it's made a real difference in my household management. I'm so excited to have finished!
What's missing from this? The two components I already have set up – the recipe stand for the kitchen, and the Evernote App on my iPhone and desktop computer, where I capture/snap photos of recipes in cookbooks that I want to try, or store whole website pages with a recipe I want to try.
This is a great way to store recipes in an iPhone (you just open up your Evernote App, and click on the “Note” where your recipes are stored), and then the recipe stand I have can fit my iphone/tablet OR paper recipes…meaning it's convenient to use whether I'm using a digital recipe or a printed one.
Pro tip: one of the cool features of Evernote is that when you search for something, like an old recipe you captured, it actually searches the words on an image. That's so helpful!
Let's dig into that meal planning sheet, and a bit more of my meal planning strategy, below.
One-Page Meal Planning Sheet
SO, I've called this my recipe binder system, not just a recipe ring binder. Right?
That's because a big part of this whole thing is also the seamless tie-in with meal planning.
But me? Well, I do meal planning a bit differently. More relaxed, and go-with-the-flow, if you will.
Here’s the thing: I’m not the type of person who wants to pick out the exact recipes I’m going to cook each day of the week, ahead of time.
BUT, I do like to have a list of recipes in my arsenal that I know I have all the ingredients for, and that I can reference anytime of the week when I need to figure out dinner/snacks/etc.
That’s why I created this printable meal planning sheet that’s really more like a meal plan list you can use to put your meal intentions down, create your shopping list, and then pick from throughout the week.
Did I mention that you’ll want to put your meal planning printable into a sheet protector and use these wet-erase markers so that you can just reuse this system over and over again without having to print out new sheets?
*claps hands in excitement*.
After each of my binders was set up, I did my first meal planning sit-down in awhile. It. was. glorious.
Dare I say, delightful?
I took the weekly meal planning sheet out of the binder, grabbed my wet erase marker, and got to work at our dining room table.
Here's what my meal-planning process looked like:
- Sorted the Recipes from the Recipe Stand: On the recipe stand are the recipes I intend to cook/make over the next week. Sometimes I get to all of them, sometimes I don't. SO, I first put the recipes I'd already used back into their spot in my new binder and then kept out the recipes that I was simply transferring to next week.
- Made a Pile of Recipes to Make: From both my Fave Recipes binder and my Recipes-to-Try binder, I chose some breakfasts, lunches, dinners, sides, snacks, and desserts to make for the upcoming week. I noted each of these recipes on my meal planning sheet.
- Made a Shopping List: As I picked out a recipe, I looked it over and figured out what ingredients I'd need to buy. Then, I wrote those down on my shopping list.
- Set Up My Recipe Stand for the Upcoming Week: I grabbed the pile of recipes I had chosen, put the weekly meal planning sheet on top, and put it on my recipe stand.
BOOM. Done. Amazing how much better my system is working for me!
A few more tips to add to your style:
Bonus Tip #1: Use Scrapbook Paper to Freshen Up Your Binder
I got binders with a pretty solid color that I liked, but with a front slip to it so that I could pick out colorful scrapbook paper to insert (and would be able to change this up 7 years from now when my style has changed).
Again – this is a system that can change with me!
Bonus Tip #2: Use Wet Erase Markers Vs. Dry Erase Markers
You can use dry erase markers for the meal planning portion of things – over the laminated sheet protector.
The only issue you might come up against is that if it rubs up against anything (like, the inside of your binder cover), then it can rub off.
Instead, wet erase markers will also erase clear each week, but only when you wipe it with a damp cloth.
Your choice, of course!
Bonus Tip #3: You Can Pare Down Your Cookbooks Afterwards
If you use this system and just photocopy recipes from your books that you want to keep in your central recipe binder, then you might no longer have a reason to keep around most of your cookbooks.
You can then use something like this super-cute and functional cookbook rack for the remaining ones, instead of valuable bookshelf or cabinet space you’re currently using.
Bonus Tip #4: Remember that Sheet Protectors are Thicker than Paper
Remember how I said I picked two binders with 650-sheet-capacities? That's because I found out the hard way to take into account the thickness of a sheet protector versus a regular sheet of paper.
In other words, I bought the 475-sheet binders to begin with, then had to take them all the way back to the store to exchange them for 650-sheet binders when I realized they just weren't big enough.
When you learn how to organize recipes in a binder, and pair it with a meal planning sheet? Well, it makes your life (and mine) so much easier. And that's what we Mamas need, right? An easier way to manage our homes, our budgets, and our meals.

Amanda L. Grossman is a writer and Certified Financial Education Instructor (CFEI®), Plutus Foundation Grant Recipient, and founder of Frugal Confessions. Over the last 17 years, her money work has helped people with how to save money and how to manage money.
She's been featured in the Wall Street Journal, Kiplinger, Washington Post, U.S. News & World Report, Business Insider, LifeHacker, Real Simple Magazine, Woman's World, Woman's Day, ABC 13 Houston, Keybank, and more. Read more here or on LinkedIn.